May 10, 2014

Filofax Compact Pennybridge Review

And here it is! The Filofax Compact Pennybridge in black. I picked it up today at the post office and admittedly, I was excited. Besides, I had high hopes for this one - this was my first compact Filofax after all, and I was really interested to see how tiny those rings really were, or how great it acts as a wallet.

Here are the unboxing pictures:

All the way from UK!
First: Box wrapping
Second: material wrapping
Third: Filofax plastic wrapping

I was happy with how it was wrapped and wasn't quite surprised that it came in the plastic Filofax wrap rather than the black cardboard box, which I've read, are being phased out. It does make the item look cheap, but oh well, I did grab this for a bargain anyway.

Now onto the actual product:

Front
Back
Nothing-fancy zip

Thickness
I must admit, the material was absolutely lovely for a non-leather product. It was smooth and soft and for someone who loves leather product, this would probably be the only non-leather Filofax I wouldn't mind having. It's slightly grained as seen in the pictures and it's an all round great product. The zipper was plain, simple and doesn't contain any Filofax engraving as my Holborn did.

Inside:

I didn't realise it at first, but this seller didn't include any A-Z tabs or dividers... Hmm..
Pockets!
More pockets!
Pocket on back cover
When I opened it up, I was... let's just say... a little overwhelmed with the amount of pockets the Pennybridge held. Although I've seen it in pictures, it never quite comes to the real thing.. I wasn't really interested in the inserts that was available in the diary as I had my own so I wasn't too upset that it didn't come with dividers. I was more interested in the folder itself. For one thing, it didn't open flat, which I was fine with, and for another, there was something quite peculiar about them:

  1. It's really hard to close the rings when you have as much inserts as what was given. The small metal rings made it slippery for my fingers to close them and I had to do everything to avoid my fingers getting snapped up when the rings finally decided to close
  2. This Pennybridge had... really weird rings (can't say it any better than that!). If I used the set of rings on the right to close it, the left set would only close halfway, needing that extra guidance to close it the whole way, and vice versa. The rings had no gaps or any significant problems with it, I just thought that was a little weird and I'm not sure if that's the same with all Pennybridges out there?
These are how the rings look like:


Tiny rings!
And this is the ring size comparison with my Holborn:

Not the best picture out there but the difference is obvious

Now comparing the Pennybridge size to my zipped Holborn:

Holborn vs. Pennybridge
Height comparison
Up top!

The real test came when I decided to fill the Pennybridge up. I didn't put in everything I had in my Holborn, just adding the necessities which included my month to view, week per page, notes and expenses. These were held fine by the rings. The pockets, however, were a different story. This is what happened when I decided to put all my cards in the slots:

Doesn't close!

Maybe I have too many cards, but what's the point of having so many card slots if you can't use them all?? And yes, although it was able to be zipped up properly, there was this bulge coming from the cards that was really unpleasant:

Bulging Pennybridge

You can't exactly see it in the picture, but trust me, it's there. So after all the excitement and high hopes for this baby, I must say, I was actually quite disappointed at the end of it. It's a nice product overall to maybe just put a few cards in, but it can't exactly be used as a fully-functioning wallet. Not to mention, you could basically forget about the addition of a phone into the designated phone compartment; poor Penny would probably explode by the end of it. In the end, this Filofax would probably be only used to be stared at and stroked and not exactly be used in the real world for me. It's neither great in the wallet compartment or practical, and it's small rings limits your inserts greatly. Maybe one day I'll find a use for it, but for now, on eBay it goes!

(If there are any readers out there who still crave a Pennybridge despite what I've said on this review, I'll be selling this Pennybridge for AUS$40 - postage will be calculated individually. Do contact me if anyone's interested! SOLD!)

May 9, 2014

Slim Day Runners Review

Updated: I had this post published a while back that was lacking some details. This is thus the updated version of it.

On the 11th of April, before class, I decided to tour the city a little bit to pick up some stuff which I couldn't wait to pick up (as always).

Debden Day-In-View Refill from Officeworks for $5!

Elizabeth St Officeworks in Melbourne's city is currently (not sure if they still do) having a sale of organiser refills. These include Debden desk and personal refills and Filofax refills in personal and pocket sizes. I bought the desk version as my first every planner was a Debden Desk organiser I purchased from Fishpond. But I was quick to dismiss it due to its 7-hole binder rings and was onto Filofax in no time. But either way, since this pack was on sale for just $5, I had to grab it to use as a desk planner.

When I went over to Lincraft to check out how their 50% off store-wide sale was going, I encountered these:

Slim personal sized Day Runners

I was surprised to see them stocked in such a low-key store. A craft store, as well. They might have been old stock that was never really sold till now. But either way, as they were going for just $2 (yes, $2!) each, I had to grab some. I bought two of these but I was planning on keeping only one (brown). The other (black) was being wrapped up as a belated birthday present for a uni friend. Before I start describing these planners, these are the photos I got of the elusive Day Runners:

Inside of Persona Day Runner
Personal Day Runner rings are small!
Personal Day Runner
Comparing Personal Day Runner with Personal Holborn
Personal Day Runner with Personal Holborn. See the difference in ring sizes?
Personal Day Runner and Holborn height differences

These planners are not at all up-to-par with Filofax. I can't even say they're up to par with Filofax's cheapest models. They proudly bear the tag 'Made in China' on the inside covers and the notepad holder on the back cover is basically a slit through the fabric! Safe to say, I was very disappointed with their quality.

The rings represent compact sized Filofax rings and hence these planners have a 'slim profile' name. The outer cover is made with fabric (my mum says they're like those found on her pillow covers!) and are held together by a magnet clasp. The inside is covered with fabric as well, but are plain and would probably easily tear if not careful. There are 3 card slots on the side and an overall holder for loose papers. Nothing fancy.

What's included in the organiser are undated month-to-view and week-per-page, plastic card holder, zipped plastic holder (credits to Day Runner there), address and notepaper. For this organiser, I took out the inserts and kept it in a box so I could use the folder to place my old inserts into.

They also had an A5 equivalent Day-Runner that was going for $5 and I grabbed a brown one too, for the sake of it. They were set out the same as the Personal size just... a different size, and an increase of card slots on the front cover from 3 to 4. The major difference was the ring configuration: they had only 3 rings! They were able to fit the Debden desk refills, but you can forget about fitting your Filofax A5 refills into these!

Here are the pictures for the A5 Day-Runners:

A5 Slim Day Runner

The A5 Day Runner rings are the same size as the Personal Day Runner
Inside of A5 Day Runner. Has only 3 rings and it doesn't fit Filofax refills!
Comparing A5 Domino with A5 Day Runner
Comparing A5 Domino and A5 Day Runner ring sizes
A5 Domino and A5 Day Runner are approximately the same height

Just like the Personal sized Day-Runner, the inserts were the same, but for this organiser, I too took those inserts out to replace them with the new Debden Desk refills I purchased earlier. Overall, these planners would be good for... true beginners (had to stop and think for a moment there!). I have never seen them in Australia before today and I guess, with good reason. If you ever come across these organisers for the price I paid, it would be ok to own them for the sake of it, if not, I wouldn't actually recommend it. Oh well. I guess not every planner can be as good as Filofax!

May 8, 2014

Photo-A-Day May Week 1

Day 2: Snacks
(Taken with the Olympus)
It's never too late for Easter bunny chocolates! Loving how the Scanda's rugged leather look blends in so well with the great outdoors!


Day 3: Collection
The Collection

This is my Filofax collection as of date:
- A5 Red Domino
- Personal Brown zipped Holborn
- Personal Brown Holborn
- Personal Black Scanda
- Pocket Black Malden


Day 4: US
Studying US Methods with the zipped Holborn
 So I know this was meant to say 'Us' rather than 'US' as in ultrasound, but to each their own, right? Especially when I'm currently drowning in these material...


Day 5: 4PM

One lecture after the other...
4PM and still going strong


Day 6: From Down Low
Pocket Malden's pages from the bottom

It's been a while since I've taken my Malden out to play. And I hear the black Maldens are now discontinued too! Filofax has a tendency to discontinue really pretty items aren't they?


Day 7: Taken from Above
Holborn out in the garden

My creative juices are definitely not working for me these days, so I thought this picture of Holborn out in the garden was a great way to demonstrate the contrast between the brown of the leather and the green of the leaves.

... I'm starting to sound like my high school English teacher... hmm...


Day 8: Blue

Currently on holiday but trying to catch up with all the lecture notes while I can for the upcoming exams!

(Though my empty week doesn't quite show for my 'busy' schedule now does it...? Hah)


Till next week!

May 7, 2014

The Original's Set-Up

Firstly, no, my beautiful Original in Dark Aqua has not arrived yet, but now that I'm on holidays, why not prepare for it, no? Word is, I'll be using the delicious new Dark Aqua Original for my uni days. It's low-key enough to prevent my friends from snatching it over to have a look inside, but beautiful and sturdy enough to bring around in my bag.

I'm not sure what I'll put in it yet (apart from my lecture notes) but I may very well use the 2014 vertical week-on-two-pages in conjunction with my personal zipped Holborn (or my new compact Pennybridge?) seeing it's already supplied. But instead of using the A5 to record the events of my daily life (which are too personal to be listed in a uni organiser), I shall use it to just record the classes I need to attend to, to prevent me from printing out the timetable every week (because it changes oh-so-often!).

But lets not jump the gun; I can figure these things out a little later, when The Original does arrive... So onto the dividers that will make up the organiser:

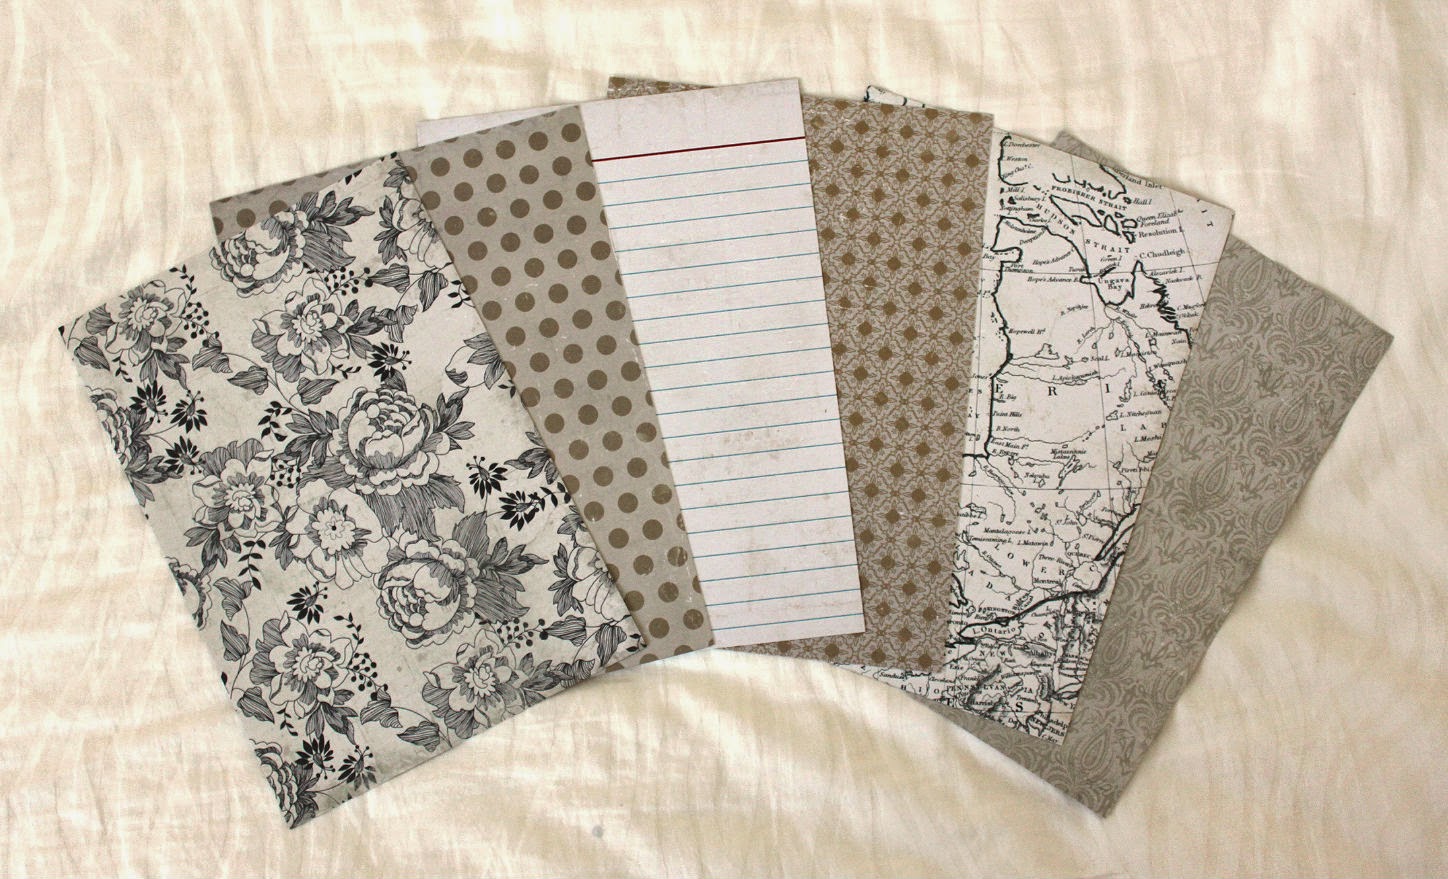
I've opted to use the same paper as I did for my Holborn seeing they were the only decent, double-sided low-key dividers that suited the colour theme. The papers are from Project Life's Vintage Edition paper pack and are a little stiffer than regular A4 paper, which makes it great divider-material. It came in the usual 30x30cm size, so I had to trim it down to enable it to fit into the upcoming A5:

A5 Dividers
I purchased a Rapesco 66-P on Tuesday, so I think I'll keep the hole-punching till the Rapesco arrives so I can test it out. Also, as you can see from the picture, I didn't cut out the tabs with the dividers. I'm planning on cutting out separate plastic sheets with the tabs to place before the dividers so I can change the order of my dividers whenever I want to. The plastic sheets will also provide further protection for my dividers.

This is how the papers look from the back:

A5 Dividers from the back

I prefer double-sided papers over single-sided for dividers as single-sided papers would look too plain... especially when I was planning to do this:

Back-pockets to all my dividers!

I used Kaisercraft's Take Note 6x4" journal cards to create the pocket holders as it fitted the A5 size nicely horizontally with just a little trimming on the sides. These are how they looked like separately:

Kaisercraft Take Note 6x4" Journal Cards

They too are double sided, so I had a variety of choices to choose from, but these were the best matching for the divider papers I used. In a few days from now, I hopefully plan to decorate the dividers entirely using Kaisercraft's Collectables range to add a little colour and character to the pages. I'll post how it looks like after they're completed.

And that's that! Now all I need is the actual organiser to put it into... hmm..
Can you tell I'm a tad bit excited for its arrival?

May 6, 2014

Craft Books Review

I bought these last week at Lincraft's closing Melbourne city store (last day is on the 12th!) because they upgraded their discount to 75% off storewide! Unfortunately, the paper craft section upstairs has closed leaving just the books, fabric, knitting, and sewing items downstairs. And needless to say, the lines were long and moving really, really slow. But either way, in order to abuse the savings, I had to suck it up, join the queue, and buy these two (hardcover) books:

Hardcover books bought from Lincraft for a total of just $7!
Inside of The Scrapbooker's Essential Guide to Colour
Inside of Simple Landscape Painting

It was really cheap, I must say. The Scrapbooker's Essential Guide to Colour costed me $2 and the landscape painting book just $5. I don't usually buy these craft books as you can really search these things up online nowadays, but knowing the books were 75% off made me want to buy them nevertheless. They're nice books though, and they can really jog your creativity when you're lazy to look things up online, especially for scrapbooking layouts. Not to mention the abundant of information that you'd need to go through just to find the perfect one.

The Scrapbooker's Essential Guide to Colour displays layouts with singular, dual, tetra, etc. colours, with a layout a page. It also describes the usual connotations a layout might give for the colour used. Although the book is hardcover on the outside, the inside hides a sneaky spiral bound book with a free colour-wheel inserted on the back cover to use in complementing colours.

As for Simple Landscape Painting, I love the basic information they give that can (hopefully) help to improve my painting skills when I have the time. It gives you step by step information on painting trees (as seen in the picture), buildings, and basically, as the title suggests, landscapes. It's a really lovely book.

And so, if you're living anywhere near Melbourne, right now's the time to head down to the Lincraft store before everything runs out! If you don't mind the queue, that is...

May 5, 2014

Week Set-Up

So, here I am showcasing Week #19, with a little twist: I'll be reviewing Tim Holtz's Distress Ink at the same time. So in order for me to do this, here's a look at this week's pages:

Week #19 using Tim Holtz's Distress Ink
Materials used in this layout:
1- Tim Holtz's 'Vintage Photo' Distress Ink & applicator
2- Washi Tape
3- Project Life's 3x4" Journal Card

Bear with me a little, I know my layout ain't as fancy as others I've seen out there, but with really limited resources (like stickers!), and events that usually requires all the space possible for each day, this was the best I could come up with.

The usage of Tim Holtz's Distress Ink was a step up for my planner. My other weeks are mostly 'plain-Janes'. Though, I must admit, I really am an amateur at using the distress ink, so the shading with the applicator is a little rough on the edges (pun-ny?). But I'm pretty sure with time, I will hopefully get better with it. After all, practice makes perfect. I do, however, still like the look it gave to my pages. The Tim Holtz colour I'm using in this layout is called 'vintage photo', and with good reason. It's a nice soft, subtle brown which gives that antique, aged effect to any type of paper, photos or fibres.

These inks are water-based dye inks and are able to be mixed with other ink colours, misted on to create a mottled effect or used plainly for stamping or shading. They're acid free, non-toxic and fade resistant (says their website). I've tried using these stamping pads with acrylic stamps, however, they gave that usual mottled, unclear, non-sharp lines appearance I absolutely hate (and currently have a hard time describing). So here's a picture to show how they turn out when being used with acrylic stamps on regular A4 paper:

Tim Holtz ink on regular paper using acrylic stamps

I was thinking that maybe it's the type of stamp I'm using, because I've seen them being used with regular rubber stamps and turning out just fine. So I tried it, and voila:

Tim Holtz ink on regular paper with rubber stamp

It does look a tad bit better and a little more defined than the acrylic stamping, but the details and lines are still not too sharp as an oil-based ink would have. (It could also very well be due to my crappy stamping though... hmm.) But you can tell that the ink isn't really well evenly spread with little blotches in areas where the ink was saturated.

But alas, this isn't a review on it's ability to be used as a stamping ink. Overall, when being used with an applicator, the colour turns out beautifully, giving that weathered look which was the initial aim. I also love how well it has gone with the Project Life journal card I've slotted in. If I could find it in Aussie stores, I would definitely buy more colours to try out its blending abilities.

And that's Week #19!

(On another note, I gave into my temptations and bought myself an A5 Dark Aqua Original on eBay! D'Oh!)

May 4, 2014

Filofax Lust!

* photo found on philofaxy.com
Hi,

My name is Nadia and I am not going to buy that exceptionally beautiful A5 Original Filofax in delicious Dark Aqua colour that has my heart racing every time I look at it. I will also not lust after its full, thick leather exterior and smooth finish that has got me drooling, nor will I love the black interior that is a lovely contrast to the Aqua. It's adorable little popper button will not get me swooning nor will it's elasticised phone compartment. I will not fancy it's UK origins and I will not have a fondness for its original fly-leaf cover. I will not have a soft spot for it's notepad slot nor will I like its white contrast stitching. It's lack of pockets will always get to me and I promise not to impulsively buy the last remaining stock on eBay for $150 till my pay comes in.

... Oh Dark Aqua Original, be mine!

May 3, 2014

Stationery Galore

My parents came back from Singapore this morning and they brought along some stationery love for the one and only. These were the collection:

Stationery from Singapore!

From left to right, top to bottom:
1- Tim Holtz Distress Ink and applicator from Made With Love
2- Washi tape - fabric & masking tape of different sizes from Daiso
3- Mitsubushi Uni Style Fit with refills of different colours from Urban Write

I love the variety of stationery they have in Singapore. They have collections from all over the world that are rare to find in Aussie. Unfortunately. And although I know for a fact that there is a Daiso store in Melbourne city, they're selling things for $2.80 a piece compared to just $2 in Singapore! So my mum went on a buying spree of Washi tape for me there.

Also, I've seen Tim Holtz Distress Inks being used recently in My Purpley Life, and I know I had to try it out. They were available in Australia but only through online stores, unfortunately. Add the $7 to $9 postage, and the item turns out to be more expensive than realised. So my mum was happy to buy me a starter pack in a small scrapbook store called 'Made with Love' that was only available in Singapore and Indonesia.

And lastly, the Mitsubshi Uni Style Fit pens. They're a great set of gel pens with a nib size of only 2.8! They have ones in 3.8, 5 and 7 too but I love the thinner nibs in my Filofaxes. They take a whole less space when writing which means more notes to pack into one column!

May 1, 2014

Photo-a-Day May!


So I know this isn't the official Filofax photo-a-day prompt for the month of May, but I can't seem to find any out there, so this will have to make do! This list is from Fat Mum Slim and is meant to be for general every day photos, but I'm going to try and make it as Filofax related as possible. I will try to post one every week on Thursday but do forgive me if I fall behind.

You can check out the rules and the way to play this game on Fat Mum Slim's website. Feel free to take part in this with me!

And as an example, this will be the 1st of May prompt for the day:

Day 1: Begins with J: Journal


Now that May has begun, a new month means new motivation to attempt to keep an every day journal in this A6 Muji notebook tucked into my Personal Zipped Holborn!