June 30, 2016

LITTLE SUMMER JOY 2016


Even though it's rainy and freezing cold here in Australia currently, I'm happy to announce that I'm contributing to Little Paper Projects' 2016 #LittleSummerJoy class! And the best part is: if you sign up before June 30 using this link using the promo code of 'SAVE5', you'll get $5 off the cost of the class!

This class will be jam packed with ideas from a bunch of talented ladies who will be teaching you ways to document your summer life by celebrating the little things in your daily life. Friends, it is not something you want to miss! Make sure you sign up now before you miss the opportunity to have some great fun this summer!

June 27, 2016

EVERY DAY IN MY MTN

To make up for the ceasing of my MTN weekly posts, I've decided to pick up a new blog post trend for my Bullet Journaling. This form of documenting has been the most practical and easiest to keep up with for a few weeks, and may very well be the only method that works for me right now. I've wrote a number of Bullet Journaling posts in the past, so this post will really be just an overview of the pages I've done and hopefully give you some ideas of how to set up your spreads:


I've been focusing on creating simple spreads in my MTN, with pages not taking longer than an hour to put together. Embellishments are kept to a minimum and supplies include the use of stickers, journaling cards, and stamps from a variety of sources (Kelly Purkey, Kaisercraft, Amy Tangerine. etc).

Till the next MTN post!

June 26, 2016

NOTEMAKER x OCHECK

O-Check Notebooks

I love vintage looking things, and the new O-Check notebooks sold by Notemaker currently fit the bill. Notemaker recently sent me a big box of new O-Check notebooks and I've been psyched to write up a post for you guys.

The first set of new notebooks from O-Check are called the Utility notebooks and comes in a variety of sizes and colours, with two being squared and perfect for field drawings. They're made from recycled paper so they're well made for drier mediums like pencil, ballpoints and gel pens. I've yet to try the paper out with my fountain pens, but as I plan to use them primarily for sketches, I'm not too fussed.

The cover is made of sturdy cardboard, and the one feature I absolutely love about these notebooks is the fabric spine:


Not to mention, these notebooks are able to lie absolutely flat when opened due to these fabric spines:


The next set of notebooks from the new O-Check range are these old-school cahiers:


They're ruled on the inside and reminds me of my primary days when I used to use these notebooks:


They come in five different designs, each featuring a different animal on the front. I have a thing for foxes currently, so had to have one of them for my collection! And because I've reached 20k on my Instagram, Notemaker and I have teamed up to give away these cahier notebooks to FIVE lucky winners. Check my Instagram out for more details!


You can find all of these notebooks at Notemaker (click here to be redirected to their site). I've been a long time shopper of Notemaker, and have always been provided with great service and fast shipping. And once you've purchased from them at least ten times, you'll be a lifetime member getting 10% off EVERY order from them! So if you're looking for your next stationery fix, don't forget to pop by Notemaker - you won't be disappointed!


June 25, 2016

CURRENTLY #17


TIME: 8:34PM
LOCATION: Bedroom / studio / office
FEELING: Cold
LOVING: My new gold iPad Pro & iPhone SE
READING: Is it bad that I haven't touched a book in 2 months?
EATING: Cadbury Mini Eggs (yes, I still have them from Easter)
ANTICIPATING: The end of one job and the start in one month!
LISTENING: Aaron Carter - Let Go (don't judge)
WATCHING: Pretty Little Liars
PLANNING: Sunday's tasks
LOOKING FORWARD TO: I don't think there really is much to look forward at this time of the year...
CREATING: MTN spreads for upcoming classes (stay tuned!)
NEED TO FINISH: Class lessons, Project Life spreads, 
WISHING: I had more time

June 24, 2016

MTN WEEKLY 2016 #12

I've been doing a lot of trialling this year, and none of them have really stuck; unfortunately this has included my MTN weekly. So until I pick something up again (and don't worry, it will be very soon), this will be my last MTN weekly post. I've included all the weeks of MTN spreads that I have done but haven't posted on my blog yet, though, so savour it while it lasts!

WEEK 12:


WEEK 13:


WEEK 14:


WEEK 15:


As usual, I've used everything and anything that fitted my spreads, from watercolour to stamps, to cool napkins found at work. There is no shortage of supplies when it comes to building up my MTN spreads.

Hope you've enjoyed my MTN weekly posts in the last few weeks and they've somewhat given you ideas in starting your own. Even though this is the end of my MTN weekly, be sure to stay tuned for upcoming projects!

June 5, 2016

TUTORIAL: CREATING A TRAVELER'S NOTEBOOK


Ok, before we start, to make things clear, this tutorial is mostly about stringing an already made notebook / passport / boarding pass holder. In this tutorial, I'm using a passport / boarding pass holder from a brand called Labrador and converting it into a MTN just because I know I wouldn't use it either wise. But before I get to it, here's a little background of the items used etc:

If you're like me, you like using original items. And when I mean original, I mean a Midori Traveler's Notebook and not a 'fauxdori'. I hate copies, and I have a strong dislike of handmade items (including my own). So when I got myself a leather boarding pass holder from Stickerrific, I had no plans to covert it to a traveler's notebook - not until I started playing with it today.

This boarding pass / passport holder is made from a brand called Labrador. I got it on the Malaysian Stickerrific site, and after coversion, it turned out to be around AU$80 - which is around the same price as a MTN kit. The only difference was - it has pockets. I wanted it in tan. but unfortunately, as they didn't have it in stock, I settled for a grey - which turned out to be a great choice.

Fast forward to a Sunday afternoon: I love my camel MTN, I really do, but the lure of pockets and the grey of the Labrador passport holder was enough to put me into my DIY mode. I had the strings and hardware needed to create a new TN, and all I really needed was to poke holes into the leather, so I thought why not? What could go wrong, after all?

So off to work I went. There really isn't much you need to create a TN style notebook if you already have one premade to size. If you have an extra MTN lying around (and chances are, you do), I'd recommend you using the holes already made as a template. Because that's basically the easiest thing you can do. Of course you need to measure it out eventually to make sure you're centered, but trust me, you'll take a whole load off if you just copy.

Anyway, here's a step-by-step method of how I went through making one (with pictures, of course!):
1- Get your stuff together: ruler, pencil, poker, needle, elastic, TN hardware

2- Measure / trace out the holes onto your new TN:


3- Poke holes through your marked areas. You'll need 4 holes, two at the top and two at the bottom

4- Thread through your elastic (probably the most difficult stage!):


5- Insert your hardware:


6- Tie a knot at the end:


That's really all you need to do. Here's a look at the end product (with two notebooks inserted):


The only fault I have with this is the weird placement of the pen holder. I am highly tempted to cut it off if only to reduce the bulk, but I think I'll just live with it for now. Apart from that, I'm currently obsessed with it. I never thought I'd replace my MTN with another - especially a home made one - but I love it to the nth degree. You should give it a go if you have the chance. I promise, you wont regret it!

KELLY PURKEY MAY REVEAL


I received Kelly Purkey's newest stamp kit and sets just before the weekend, so safe to say, I managed to go all out on the weekend playing with them. There were four new stamps released, including two new kits.


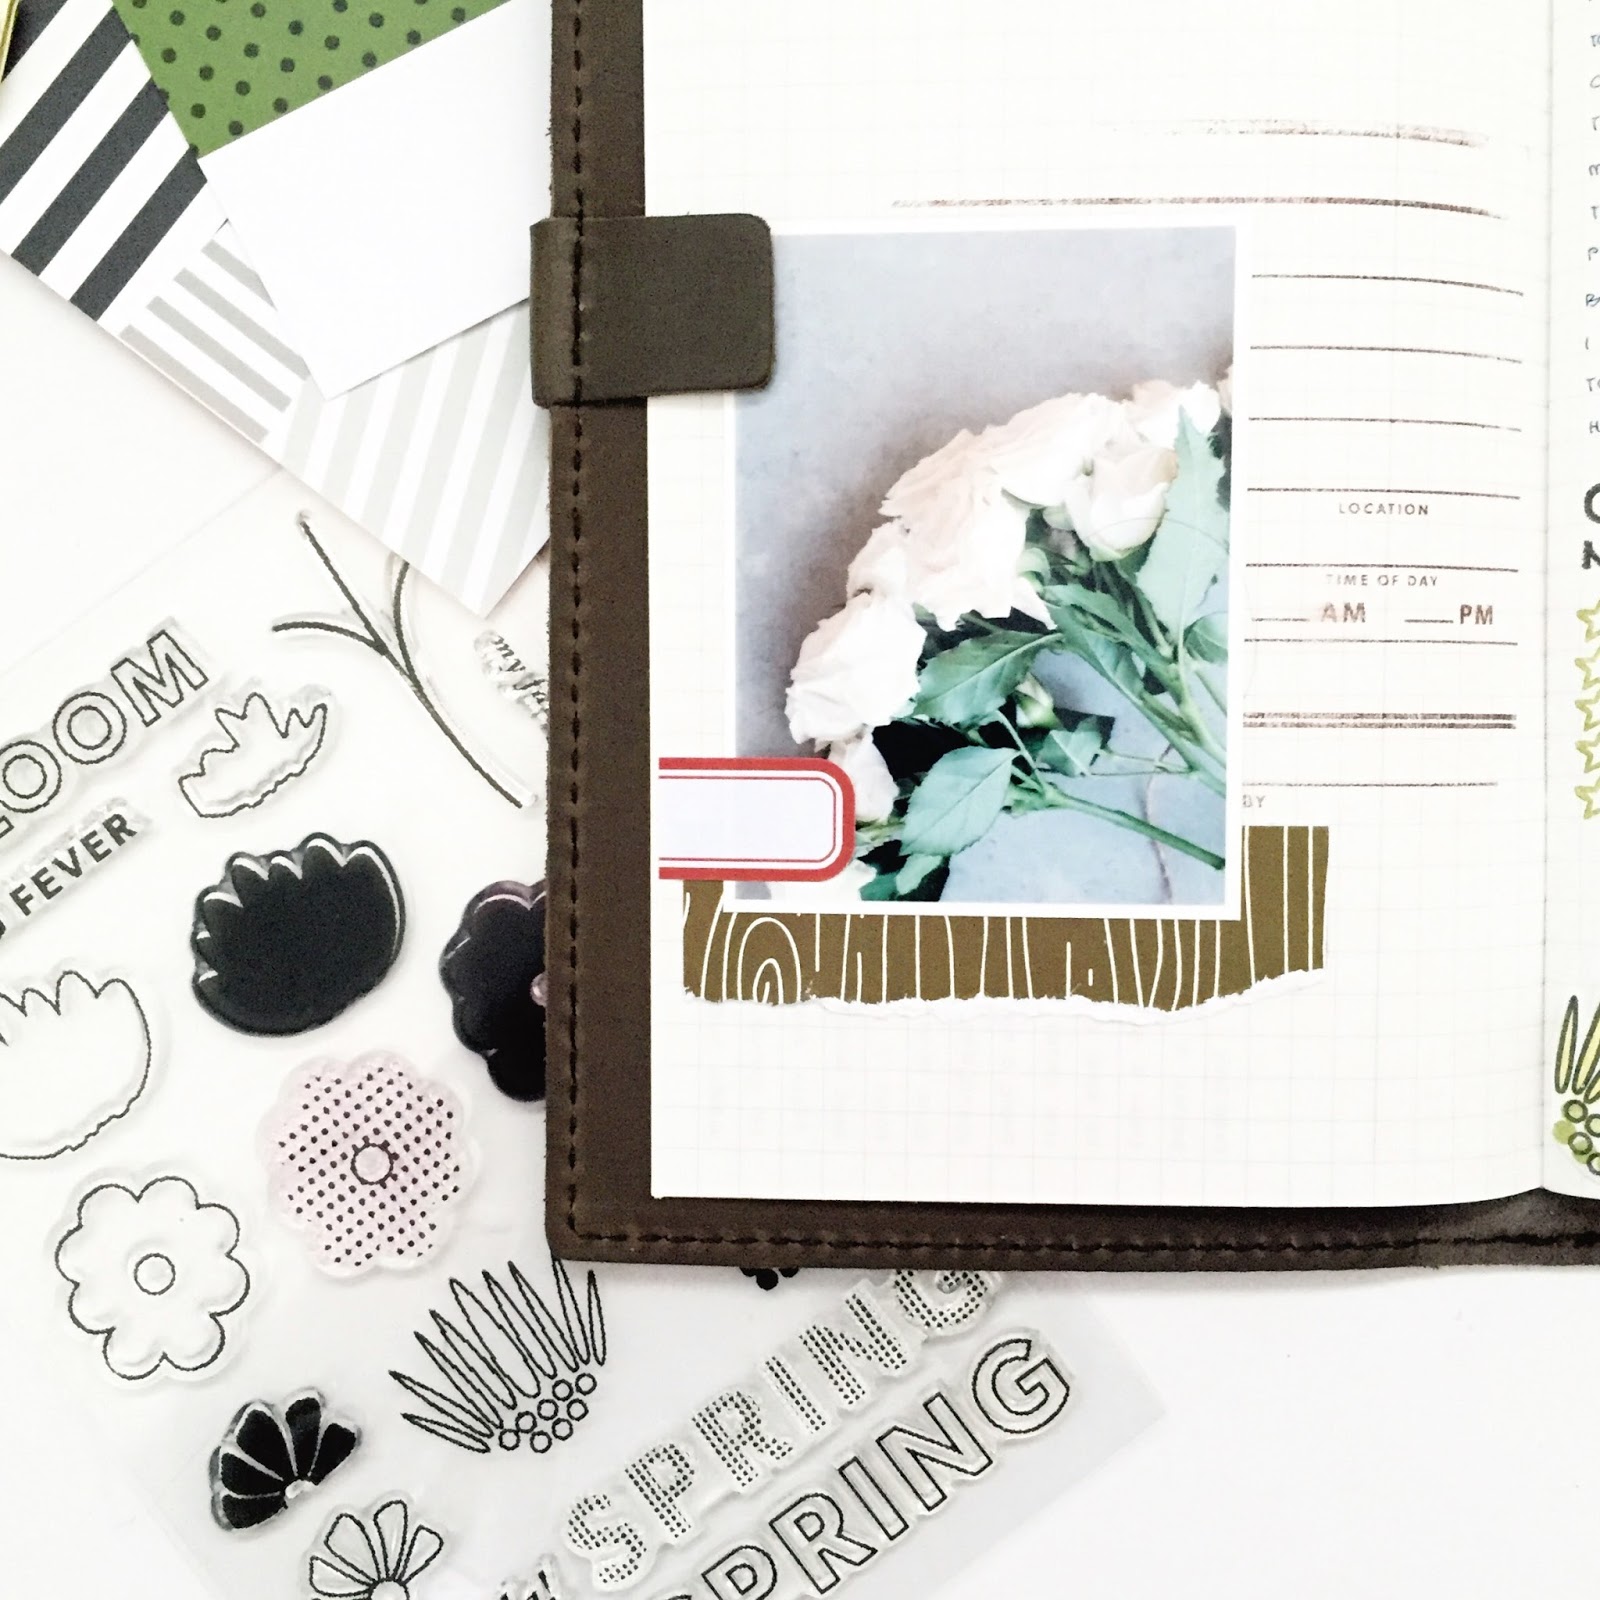
I've been having a slightly hard time incorporating the KP stamps into my 2016 Project Life lately (because truth be told, I've been slacking when it comes to printing them), so I figured that it was time I did that thing I said I was meant to do months ago: combine my scrapbooking + Bullet Journaling into one. Best decision ever. Don't know why it took me this long to do so, truth be told. And because I haven't do one of this in a while, here's a mini tutorial on how I put together a super simple scrapbook page using everything from the Kelly Purkey kit and 'In Bloom' stamp set:


It's autumn winter here in the southern hemisphere, so although the Spring themed stamp set didn't quite match, I used it either way. The journaling cards were from the He Says, She Says kit. Basically and literally everything used was from Kelly Purkey.

Once I got my photo printed, I tore a strip from the orange journaling card, slapped it on the blue and my background was done.


Next went the 'In Bloom' stamp with the help of a Posca Black marker to colour in:


The last bits were adding 'grass' on the bottom, and a brown stem for that autumn feel:


I'm all for keeping things simple for my layouts, so I'm more than fine with keeping it as is. It's ok to have great white spaces sometimes to let the eyes rest. Not to mention, it keeps the bulk down!

Hope this gives you some ideas on how to use your Kelly Purkey stamps and kit! Click here to get yours now before they run out!

June 1, 2016

JUNE GOALS


It's crazy to think we're almost half way through the year. It won't be long before we're making new year's resolutions and buying up 2017 planners too! Either way, here's a look at how I faired at last month's goals before heading into the new month (and season!)
  • x    Read two books: Nicholas Sparks / Jojo Moyes
  • x    Catch up with my PL layouts
  • ü Catch up with my MTN journaling
  • ü Blog post at least once a week!
  • x    Decrease the sweets
  • ü Keep up with my brain dump book
Lol well, there's always June right? But to be perfectly honest, I don't have high hopes for June as I know my schedule will be packed from morning to night. But here's to hoping:
  • Read two books
  • Keep a habits tracking list
  • Exercise!
  • Donate, donate, donate!
  • Keep up with the blogging
  • No Less spending
Let's do this!

May 17, 2016

MTN WEEKLY 2016 #11

I've been procrastinating (hard) with my blog these days, but when I do get around to it, I tend to do it all at once, so I guess that evens it out. This time, it's updating my MTN weekly posts. I've been keeping at it for a while now, although I must admit, I have strayed to other projects too. I never seem to be able to stick to one these days, and the only one I seem to keep around is my messy 'everything-in-one' notebook. But I'll save that for another post. This week's MTN spread goes from the 2nd of May to the 9th of May (and that's a long time ago):


It was Star Wars Day on the 4th, so of course I had to include a BB8 stencil in it. Throw in some stamps from Kelly Purkey's shop found here, some alphas, pressed leaves and stamps, you've got a complete layout to go

May 16, 2016

MTN CAMEL


Yes, it's finally in my needy little hands, and I'm in absolute love. Sometimes I wish I can carry my brown and camel MTN with me everywhere I go, but alas, I'm not that crazy. Anyway, here's all the pictures you're waiting for so feast on them, and drool if you must, because it was definitely worth the wait:


I've reviewed both the brown, black and blue MTN on my blog, so scour for them if you must to learn everything about them. You can get them on pre-order in Bookbinders Online now, or head to Stickerrific to get them straight from Malaysia.

May 14, 2016

MTN 10TH ANNIVERSARY


I was actually pretty hesitant in purchasing one of these, because for one, I know for a fact that there is basically no point in having one. Don't get me wrong though, the 10th Anniversary MTN was pretty darn cute, but what can they be other than collectables? But as always, I was talking myself up into buying one. I mean, I loved the tin it came with and the fact that it fits the regular MTN. I loved the stickers. And well, I just wanted one, and by the end of my talk (which was not long), I wanted one really badly. So you'll understand when the super cool team at Notemaker asked if I wanted one to review. Because um, yes, I do. I really do.

So one came rushing (as fast as it could through snail mail) to me from Notemaker and I had it in my greedy little hands in no time. I was fortunate enough to get a brown version (orange tin) which matches my trusty brown MTN. Here are some pictures of my new little MTN friend:


The 10th Anniversary set is basically a DIY MTN. You create your own little notebooks using the tiny paper provided before slipping it in the baby Midori. They've even thrown in a little charm for your MTN too, which is honestly too damn cute.


You can get your own little 10th Anniversary now on the Notemaker site. Just click here and you'll be redirected straight to it! (You might even end up picking a whole lot of other stationery goodies and that's ok) Happy shopping!

May 12, 2016

CURRENTLY #16


TIME: 3:59PM
LOCATION: Work
FEELING: Productive - Managed to get some painting and blogging done in between patients. Yep. You heard right.
LOVING: My new peg board and dried flower bouquets
READING: Sheltering Rain - Jojo Moyes
EATING: Caramel Popcorn
ANTICIPATING: The rain to fall
LISTENING: Good Charlotte - Sex on the Radio
WATCHING: Elementary
PLANNING: To write all the blog posts
LOOKING FORWARD: Graduation next week! Eeek!
CREATING: Watercolour paintings
NEED TO FINISH: My Project Life layouts
WISHING: I had more data on my phone - it's depleting at an exponential rate

MAIN GOAL: Get all my blogging, Project Life and journalling done

May 6, 2016

BOOKBLOCK ORIGINAL


A while ago, I received a little customised present from Bookblock Original. Now, this company is revolutionary - only because you're able to customise your own notebook inside and out. I'm particularly picky with my notebook. It has to have certain paper thickness, soft / hard cover, etc. So when Phoebe from the Bookblock team asked if I wanted to try out their fully customisable notebooks, you bet I said yes.

But before I get into the details of the notebook I received, here's a little overview on their company:

Bookblock Original used to manufacture notebooks for agencies and brands, but recently decided to downscale their process so that illustrators, designers and notebook lovers (basically you and me!) in general are able to produce their own fully customisable notebooks! They are manufactured in the UK, contain recycled paper, and are able to create customisable notebook covers with full bleed digitally printed covers. This means that for approx. the same price as a Moleskine, you'll be able to not only create your own cover, but choose the type of paper that goes in it, the availability of a back pocket and even pictures on the inside!

So of course, when I had the opportunity to make my own, I had to create something entirely for me, which meant drawing (literally) up an original artwork for my front cover. Here's a close up of my artwork on my new notebook:


As you can see, every little detail of my line work has been carefully printed out onto the front cover and I can't wait to customise it a little bit more by adding some paint (yes paint!) to the front cover when I get the time. I have so many ideas for this blank canvas and I'm absolutely stoked to get started on it.

I managed to get the plain paper option on the inside and was pleasantly surprised when I found out that the actual pages in the notebook is from the Monsieur brand (which I love!):


I own a couple of sketchbooks from the Monsieur brand and know the quality they have, but have yet to test out the plain pages. Here's to hoping that it doesn't disappoint!

Check out their site here if you want to find out more and create one for yourself!

May 3, 2016

BRAIN DUMPING IN MY MTN

On Wednesday, two weeks ago, I decided that it was time to get on with using my 8273458 MTN notebooks. I had a spare plain notebook in my MTN when I was at work and I just had too much information in my head that needed to be noted down and stored so that I didn't forget. So with just a pen and the notebook, I wrote. I didn't have any washi tape with me, nor did I have any stickers, no stamps or pretty paper - just a pen and a lack of fear of the white page. Once I made the initial mark in the notebook, everything flowed out easily and without any doubt. I know I keep saying that I will make 'xyz' notebook plain and simple (but end up decorating till no end), but I think this will stay that way. Decorating a spread is always fun, but it takes time. With my brain dump book, I won't have that time, so I'll be relying on just minimalistic doodles and words. And just because a notebook is filled with just that, doesn't mean it can't look great too. Here's a look into one of my pages:


Hope you've got a brain dump book too, because it really is just therapeutic!

May 2, 2016

MTN WEEKLY 2016 #10

I had a number of things to document this week with a whole lot of happy mail coming through, but I was limited with the little space I had, so only kept it to the main items. The biggest happy mail I received this week was from Stickerrific which contained a whole bunch of washi tapes, stamps, stickers, and my new Camel MTN. I couldn't get it all in, but stickers I received were pasted in asap. This week, however, also saw me making some mistakes in the spread, like trying out Muji instore stamps with weak ink, and glue stains that didn't come off. But I powered through, and in the end, it didn't really end up so badly. It could've been better but I'm going to look forward to the next week and hope these mistakes won't happen again! For now, here's a look into my spread:


I think I need to learn to embrace white spaces and stop trying to fill in every little nook in my spread because although it looks super, it can look overcrowded at times!

May 1, 2016

MAY GOALS


I can't believe it's already May! But that only means one thing: graduation is coming up sooner rather than later and I'm stoked. But before we get to that, here's a look into how I went with last month's goals (I can tell you now, it did not go well!)
  • x     Read at least two books
  • x     Paint more
  • ü Blog post at least once a week!
  • ü Keep a brain dump book
I knew I was going to be busy, but I didn't know it was to the point where I wouldn't get any reading time in. Boo. I'm hoping to pick up my reading again in May but I know for a fact that my work load only goes up from here, so who knows, my reading may need to take a back seat again in May. Nevertheless, here's May's Goals List:

  • Read two books: Nicholas Sparks / Jojo Moyes
  • Catch up with my PL layouts
  • Catch up with my MTN journaling
  • Blog post at least once a week!
  • Decrease the sweets
  • Keep up with my brain dump book

Let's see how this month goes!

April 30, 2016

MTN WEEKLY 2016 #9

I admit, I skipped a week in my MTN, but only because I just couldn't keep up with all my journaling and creating new projects when I know I should be finishing the old ones. But don't get me wrong, I'm still doing my MTN weekly - just in a different style, and one that I like a lot more than before. If you follow me on Instagram (@lettersinnovember), you'll know what I'm talking about. I used to use my MTN weekly insert to journal on the left and scrapbook on the right, but now that I can't even keep up with journaling in my Kikki K, I've decided to scrap the journaling and go for a more spontaneous merge of to do lists and memory keeping. It's working well so far as I do my decorating on the go and need not cram a whole week of scrapbooking in one day. This is the first week of my spontaneous / messy scrapping in my MTN:


I used a whole bunch of different stamps, stickers etc in this spread, like Kelly Purkey, Kmart, Tim Holtz and MT washi tape, but the items I'm planning to utilise in future spreads will all depend on what I get my hands on in that particular week. Check back soon for a look into the next spread I did in my MTN!

April 29, 2016

PROJECT LIFE 2016: WEEK 13

I hope you've gotten your hands on all of Kelly Purkey's new stamps because I've got another Project Life layout made using her new April Good Morning kit:


I was up early many times this week as I was primarily on morning shifts and therefore witnessed a number of breathtaking sunrises. It so happened that KP's kit coordinated with this week so perfectly, and so most of the spread was made entirely with the kit.

Here's some close ups:


Get to Kelly Purkey's shop now if you want to get your hands on her new kit!